Wordpress like many web applications relies on apache (or something else) to serve the HTTP pages and mysql to store the data. Your wordpress website is important to you, so you need an external monitoring system to let you know what's going on.
Nagios is a great, enterprise class, open-source monitoring application; and what you need do is configure it to exactly represent how wordpress works; if you can get that right you can immediately get notified if any piece of the puzzle fails.
I'm going to write up a simple example of how to monitor wordpress and it's associated jigsaw pieces, so we're going to setup one host with appropriate dependant services. Ultimately, you should configure nagios to suit exactly how your environment works, but hopefully this "how to" will get you started.
Basic Config.
To configure nagios you need have services (such as http) associated
with hosts; to get started, I'm going to have to assume you have
followed another "how
to" and have nagios
up and running, and monitoring localhost, you can even use my own
config generator to
get you started ;) Basically you should have a generic check-host-alive
host.cfg entry like so:
define host{
        use                     generic-host            ; Name of host template to use
        host_name               linickx.com
        alias                   My WebSite
        address                 www.linickx.com
        check_command           check-host-alive
        max_check_attempts      10
        check_period            24x7
        notification_interval   120
        notification_period     24x7
        notification_options    d,r
        contact_groups  admins
        }
The first (and easiest) part of wordpress to monitor is the web-server which serves the web pages on port 80, so a /etc/nagios/serivces.cfg entry like.
define service{
    use                             generic-service         ; Name of service template to use
    host_name                       www.linickx.com
    service_description             HTTP
    is_volatile                     0
    check_period                    24x7
    max_check_attempts              10
    normal_check_interval           1
    retry_check_interval            1
    contact_groups                  admins
    notification_options            w,u,c,r
    notification_interval           960
    notification_period             24x7
    check_command                   check_http
}
Getting Technical.
Have you noticed the deliberate mistake ? I'm using resolvable names in
my config files, this is deliberate as my website is on a shared server,
and check_http with an IP address is very different to check_http
www.linickx.com , but in order for www.linickx.com to work, DNS needs to
be working. While we are here, it makes sense to monitor that as well.
In /etc/nagios/checkcommands.cfg add an entry similar to....
# 'check_dns' command definition
define command{
        command_name    check_dns_linickx-com
        command_line    $USER1$/check_dns -H www.linickx.com -a 69.73.189.228
        }
Where the -a ip address , is the ip of your "A Record", if you don't know what that is you can use dnsstuff.com to find it for you. You can now create a service that uses that command...
define service{
        use                             generic-service         ; Name of service template to use
        host_name                       linickx.com
        service_description             DNS
        is_volatile                     0
        check_period                    24x7
        max_check_attempts              10
        normal_check_interval           5
        retry_check_interval            1
        contact_groups                  admins
        notification_options            w,u,c,r
        notification_interval           960
        notification_period             24x7
        check_command                   check_dns_linickx-com
        }
We have HTTP and DNS monitored, all the wordpress data is stored in a mySQL database, so now you need to monitor that, to do that you need to setup another checkcommand; add the following.
# mySQL command definition
define command{
    command_name    check_mysql
    command_line    $USER1$/check_mysql -H $HOSTADDRESS$ -u $ARG1$ -p $ARG2$
}
This check command will log into the database and report OK if it is working, much better than check_tcp 3306 . Now you can add the following service entry
define service{
    use                             generic-service         ; Name of service template to use
    host_name                       www.linickx.com
    service_description             mySQL
    is_volatile                     0
    check_period                    24x7
    max_check_attempts              10
    normal_check_interval           5
    retry_check_interval            1
    contact_groups                  admins
    notification_options            w,u,c,r
    notification_interval           960
    notification_period             24x7
    check_command                   check_mysql!USERNAME!PASSWORD
}
For this to work the user will need to have permissions to log into the nagios machine, so if you followed the wordpress codex and added "TO wordpressusername@localhost" in your mysql statement, you'll need to add that to run
GRANT ALL PRIVILEGES ON databasename.* TO wordpressusername@NAGIOS-SERVER;
where NAGIOS-SERVER is a resolvable name or ip address. Note: Don't forget about firewalls ! Make sure that TCP 3306 is open between your nagios box & wordpress website.
The bit that actually monitors wordpress.
You are now independently checking both HTTPD & MYSQL, but what if
wordpress can't actually connect (lets say wp-config.php is screwed),
both these checks will pass and nagios will stay green; what you need to
do is monitor a page. If that page works , everything's fine, if the
page fails (and you get the default database connection error page)
then nagios flags and alert. We're going to add another checkcommand
# 'check linickx.com wordpress' command definition
define command{
        command_name    check_wp_linickx
        command_line    $USER1$/check_http -H $HOSTADDRESS$ -u /blog/about-me -s "About Me"
        }
You can alter this in anyway you want, but what it does is it looks for http://\$HOSTADDRESS\$/blog/about-me (so https://www.linickx.com/blog/about-me) and if that page returns "About Me" then everything is OK.
Tidying up with dependencies.
We've already established that if either mySQL, http or DNS fails,
wordpress will fail, so we want to ensure we don't get hit with double
alerts about the same problem, enter dependencies. HTTP is dependant on
DNS, enter the following in /etc/nagios/dependencies.cfg (make sure
you have cfg_file=/etc/nagios/dependencies.cfg in
/etc/nagios/nagios.cfg )
define servicedependency{
        host_name                       linickx.com
        service_description             DNS
        dependent_host_name             linickx.com
        dependent_service_description   HTTP
        execution_failure_criteria      n
        notification_failure_criteria   u,c
        inherits_parent         1
        }
and WordPress is dependant on HTTP & mySQL , so you need...
define servicedependency{
        host_name                       linickx.com
        service_description             HTTP
        dependent_host_name             linickx.com
        dependent_service_description   WordPress
        execution_failure_criteria      n
        notification_failure_criteria   u,c
        inherits_parent         1
        }

define servicedependency{
        host_name                       linickx.com
        service_description             mySQL
        dependent_host_name             linickx.com
        dependent_service_description   WordPress
        execution_failure_criteria      n
        notification_failure_criteria   u,c
        inherits_parent         1
        }
You can check your config with nagios -v /etc/nagios/nagios.cfg , assuming you have no errors wait for checks to go green and begin testing. Tests you can run can be anything from unplugging the cable from your nagios box to simulate a complete failure, to stopping the mysql service on your website to make sure check_mysql works.
Making it pretty for the hell of it.
Nagios has a web interface, one of the things we can do is customize it
to represent our config, how about a pretty icon for our website ? or a
custom wordpress action ? Here's how to setup a pretty icon and action
(button to click on) for our wordpress service.
To get started, you'll probably need a copy of the wordpress logo from the svn , I then cut the "W" out to make a square icon, but you can do what you like :) Firstly something non essential: To display any icon in nagios as a "host icon" you're going to need it in both png and gd2 image format, you'll have to install a conversion tool. (for redhat)
yum install gd-progs
to run the conversion, use the following...
pngtogd2 wordpress-logo.png wordpress-logo.gd2 0 1
that'll give you a chunk size of 0 and no compression as recommended for nagios.
But if you just want service icons, then you can get away with just a png. Save any custom images in /usr/share/nagios/images/logos/ make sure they're readable ( e.g. chmod 644 file ) and we're good to go.
So the config file, 1st make sure you have cfg_file=/etc/nagios/serviceextinfo.cfg enabled in /etc/nagios/nagios.cfg . My sericeextinfo.cfg has the following...
define serviceextinfo{
    host_name               linickx.com
    service_description     WordPress
    notes                   My website  powered by wordpress !
    icon_image              wordpress-w.png
    icon_image_alt          Wordpress
    action_url              http://$HOSTADDRESS$/blog/wp-admin/
}
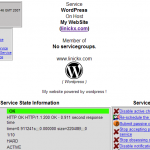
What this does is it adds my wordpress-w icon to the nagios status pages, and give me a "red star" type icon which when I click on takes me to my wordpress admin page... cool !
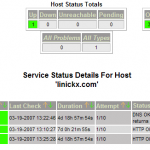
Some compulsory Screen-shots.
That should just about wrap it up, one fully monitored wordpress installation; as you can see this can be adapted to monitor any php / mysql app :) Please let me know if you have any further suggestions.


